SD1 App Addition Guide
Contact SupportIf the SD1 is not discovered, press and hold its button for 3–10 seconds. The blue LED flashes once per second while Bluetooth pairing mode is active.
Before You Start
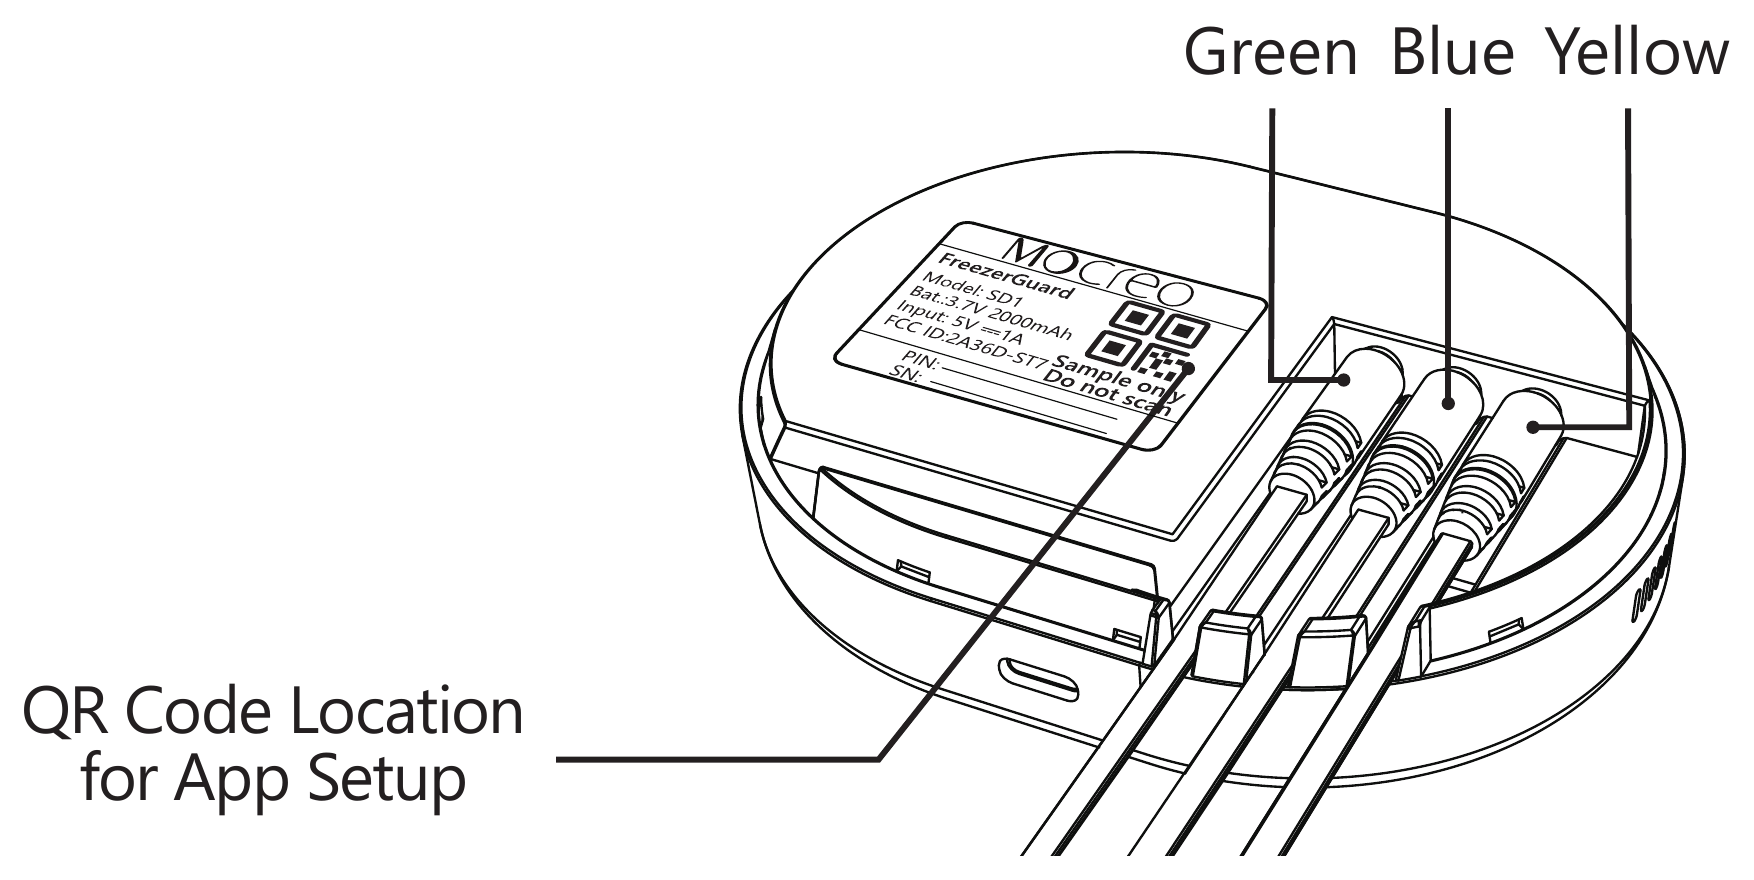
- SD1 sensor and its green, blue, and yellow color-coded probes
- The Setup QR code available for fallback addition
- A compatible Smart System Hub already online in the App
- A signed-in MOCREO account
- A phone with the MOCREO Smart App installed and Bluetooth enabled
- A USB-C 5 V / 1 A power source if the SD1 needs charging
Add SD1 in the MOCREO Smart App
- Remove the rear cover and connect each probe to the socket with the matching color.
-
Press and hold the SD1 button for 3 seconds to power it on.
-
Sign in to the MOCREO Smart App and confirm the Hub is online.
-
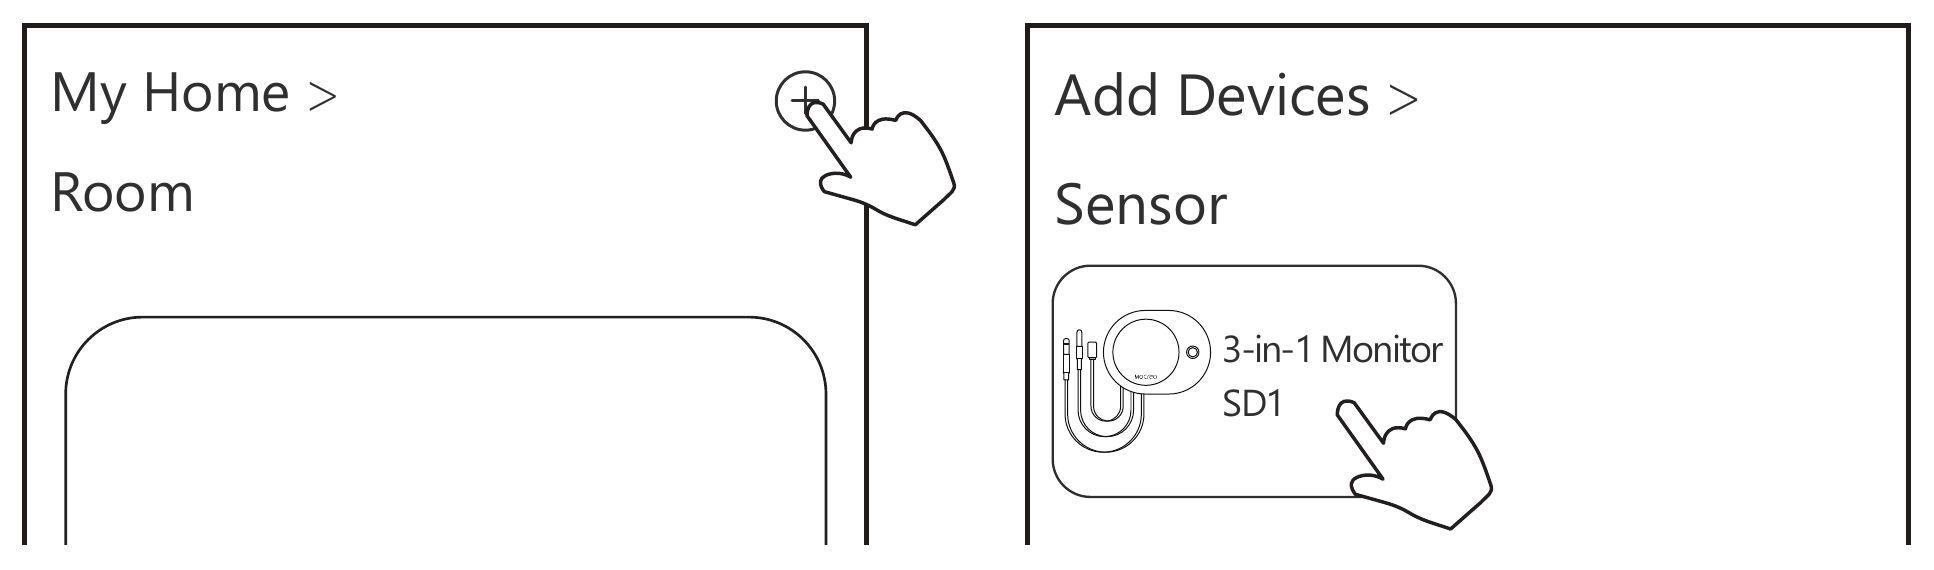
On Home, tap + to open Add Devices.
-
Under Temperature & Humidity Sensor, select SD1. The App immediately starts Bluetooth discovery and binding.
-
If Bluetooth discovery does not find the SD1, use the QR-code fallback offered by the App and scan the Setup QR code.
-
After binding, complete Setting up the room, Set name, and Set Up Probes for each connected probe.
If the SD1 is not discovered, press and hold its button for 3–10 seconds. The blue LED flashes once per second while Bluetooth pairing mode is active. Retry discovery or use the QR-code fallback.
Confirm the Device Was Added
Confirm that the SD1 appears in the App and that its measurement channels are visible.
For probe and magnet placement, see the SD1 Deployment Guide.